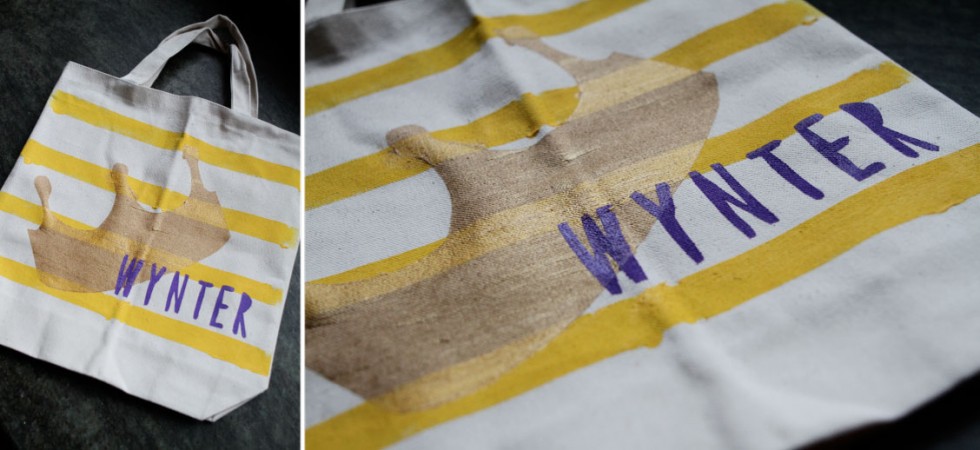
Lest you be misled … let me get this out of the way before we even start …
No, it’s not that I have too much time on my hands. Or even extra time for that matter.
It’s just that I really wanted to create something special for Wynter’s birthday this year. So when I was searching for ideas and saw this … bingo! I was all over it! I knew I was going to create a similar bag to use as the favor bags for Wynt’s party.
As I started mulling it all over, everything came together really nicely and I can’t wait to share.
So here we go … I’ll share with you the do’s, don’ts, and otherwise … :)
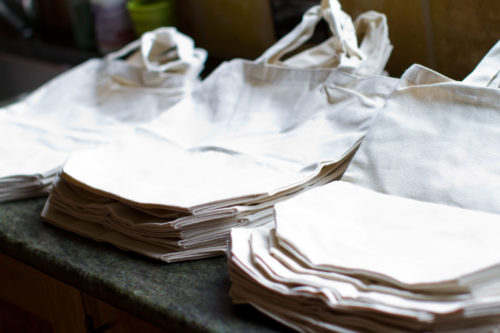
First, you need to start with a blank canvas bag … or 20. I found mine at Hobby Lobby for a pretty good price.
Then, you masking tape off your bag and paint the openings. Because I was working in bulk, I took the masking tape off right away {while paint was still wet}. But you could wait til it’s dry … totally up to you. I’m not a rigid, by-the-rules kind of crafter. ;)

For the crown … I dug deep into my bag o’ tricks … I found a photo of a crown online and dragged {drug?} it into Illustrator. I used my pen tooly-thingy to trace around the outside of the crown. Then I deleted the photo image from Illustrator and was left with an outline of the crown. Print out that image and perfect-o! you’re ready to move on.
It took me a round about way to get to the next step:
You take freezer paper {waxy-side down} and your printed image … and use an x-acto knife to trace out your image. So you’re left with your cut out freezer paper and can toss the image you printed out.
Then you iron the freezer paper onto your bag {waxy-side down}. When that’s done, you paint the opening.
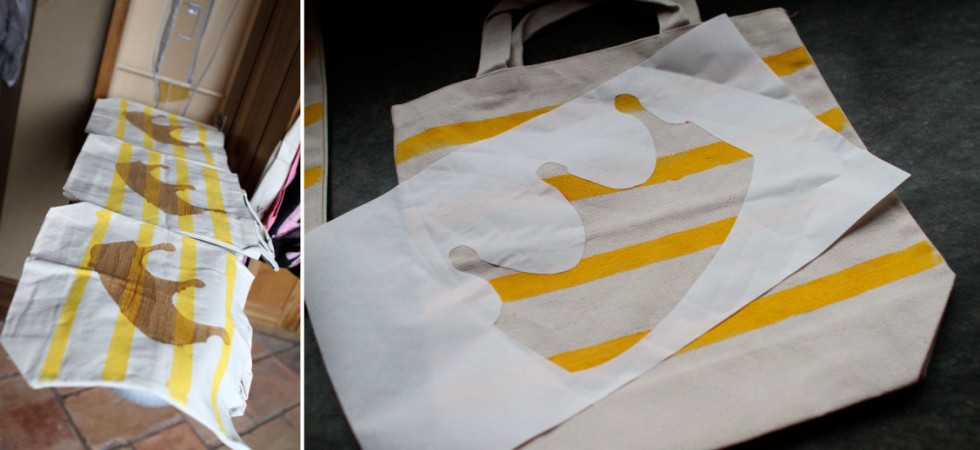
A little about my “round-about” ways … for some reason my brain cells aren’t working at 100% … well, not even 60% most of the time. And considering this was the first time doing a craft like this … I got a bit mixed-up in the head!
When I printed the crown images, I printed a few and for some reason thought I’d be reusing them, so only needed 4 or so cut out. Duh.
When you paint over the freezer paper and rip it off … you seriously can’t re-iron and repaint on a new bag.
So … if you’re doing this as a favor bag, or in bulk … you’ll need to print out the same number of crowns as you have bags.
The other thing I thought about, but decided 6 year olds wouldn’t care, and therefor neither should I … if I were doing just one bag, I might have given it more thought … but I was a little concerned that the yellow stripes came through the gold crown. But believe me, by bag #3, I really didn’t care.
Anyway. If I were doing just one bag, I might try to be tricker about the craft so the other paints don’t show through. Or not. :)
Okay, so next:
I found this awesome font that I used for the party invitations called Men In Black {click on the font name to download}. So what you do is … type up all the names {and print out separately} … print them large enough so you can cut them out and make an impact on the bag.
And then you do the same thing as with the crowns. Iron it to your bag {when the other layers of paint are dry}. Then paint over the opening. Again, I peeled the paper off before the paint dried. You can wait til it dries. Up to you.
And I thought it was awesome that one of the kids Wynter invited was named Max. Small things, right?
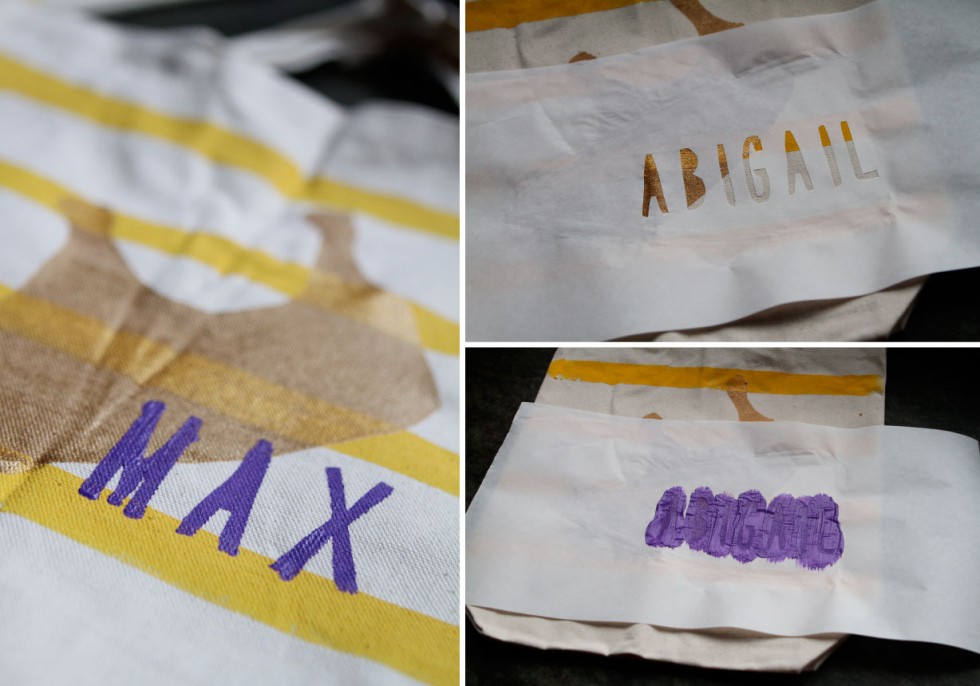
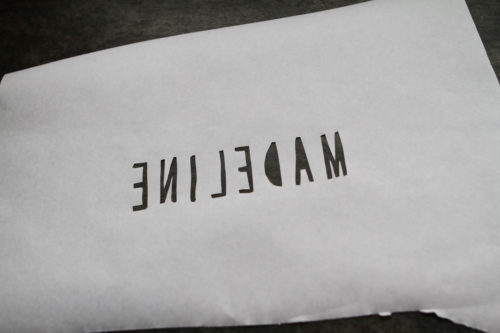
Oh! and remember … when you’re tracing your image {from the printed paper} onto the freezer paper … make sure it’s waxy-side down. Or you end up with something like this and just may get very frustrated with yourself.
Not sure if my freezer paper tutorial is top-notch, so if you’re looking for more direction, I used this post to help me out.
And here you go! The final product of my labor. I found this great puzzle book on Amazon, added a crown and a couple of popcorn balls. Her party was on Halloween and the kids were asked to dress in costume, so the pumpkin face on the popcorn balls worked perfectly.

Hope you enjoy this as much as I enjoyed doing it. No, really … I enjoyed doing it!

Pingback: metformin extended release
Pingback: metformin 1000mg
Pingback: taking glimepiride with metformin
Pingback: side effects to metformin 500 mg
Pingback: bad news for metformin 2017
Pingback: when to take metformin
Pingback: why doctors no longer prescribe metformin
Pingback: how does metformin work in the body
Pingback: dangers of metformin
Pingback: dangers of taking metformin
Pingback: what is metformin for
Pingback: why is metformin bad
Pingback: metformin 1000
Pingback: metformin and pcos
Pingback: can metformin cause dementia
Pingback: does metformin cause weight loss
Pingback: how to take metformin
Pingback: glucocil and metformin interactions
Pingback: urgent news about metformin
Pingback: metformin hcl 1000 mg
Pingback: metformin and pregnancy
Pingback: what are the side effects of metformin
Pingback: is metformin safe
Pingback: metformin 850 mg
Pingback: best time to take metformin
Pingback: how long does it take for metformin to work
Pingback: metformina
Pingback: metformin patient information sheet
Pingback: side effects of metformin hcl
Pingback: what does metformin do for you
Pingback: metformin side effects in elderly
Pingback: metformin without a doctors prescription
Pingback: metformin without prescription
Pingback: buy synthroid
Pingback: online synthroid
Pingback: synthroid online
Pingback: cheap synthroid
Pingback: buy cheap synthroid
Pingback: synthroid
Pingback: synthroid side effects
Pingback: synthroid dosage
Pingback: side effects for synthroid
Pingback: synthroid medication
Pingback: synthroid coupon
Pingback: synthroid vs levothyroxine
Pingback: synthroid generic
Pingback: synthroid coupons
Pingback: interactions for synthroid
Pingback: side effects of synthroid
Pingback: synthroid dosing